This is an old revision of the document!
Anatomy of an Index Card
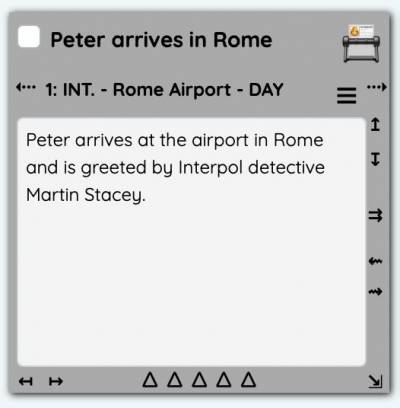
 The Index Card is the basic unit within a project. It is used to initially plan the structure of a project, manipulation of their position allows planning of the events, entry of basic details gives information as to when and where an event is taking place, while completion of an index card's Content develops the project into a final authored work.
For the majority of time, two text fields are used to understand when and where an index card is important in the project: the Title field at the top of the card, and the Summary field which takes up the majority of the card. Both of these fields can be edited directly by simply clicking in that area. Both are technically of unlimited length, but logic dictates what you should store there: the title field should be short and succinct, while the summary field can be used for larger notes and references, with the initial top text (which will be visible most of the time) summarising what the card is for.
As work progresses on the project however, you will use more of the index card's capabilities. These capabilities allow you to categorise the card into known story arcs, move the card to reorder the events in your story, add new index cards, and edit the actual authored Content of your document.
### Story Arc
The Arc colour is the only aspect of an individual Index Card which is controlled by the main toolbar menu, and not a control on the card itself.
In order to set a specific arc colour for an index card, first select the card by clicking in the title or summary area.
Switch to the [Cards] toolbar tab if not already there, then click the [Arc] toolbar icon to display the list of available arc colours. If you have configured the project using the [Main] > [Config] toolbar icon, this list will also include any customised tags that are attached to the colours (e.g. Red (Peter's Arc) ).
Selecting one of the colours from the menu will change the overall colour scheme of the selected Index Card, effectively placing it into that story arc. As well as a visual indicator, the [Range] toolbar icon can be used to select only individual arcs for display at a time, streamlining the development of that arc.
