
Table of Contents
Mystic Help
Issue and Return
The [Issue and Return] option is very similar to the layout and functionality of the [Borrow or Return an Item] for individual readers. In this case however, the [Issue and Return] function was designed specifically for the use of trusted readers and the convenience of library staff, being oriented towards the circulation of items to other and varied readers.
The [Issue and Return] option therefore represents the OPAC level circulations facility.
Basic Issue
In order to issue an item to a reader:
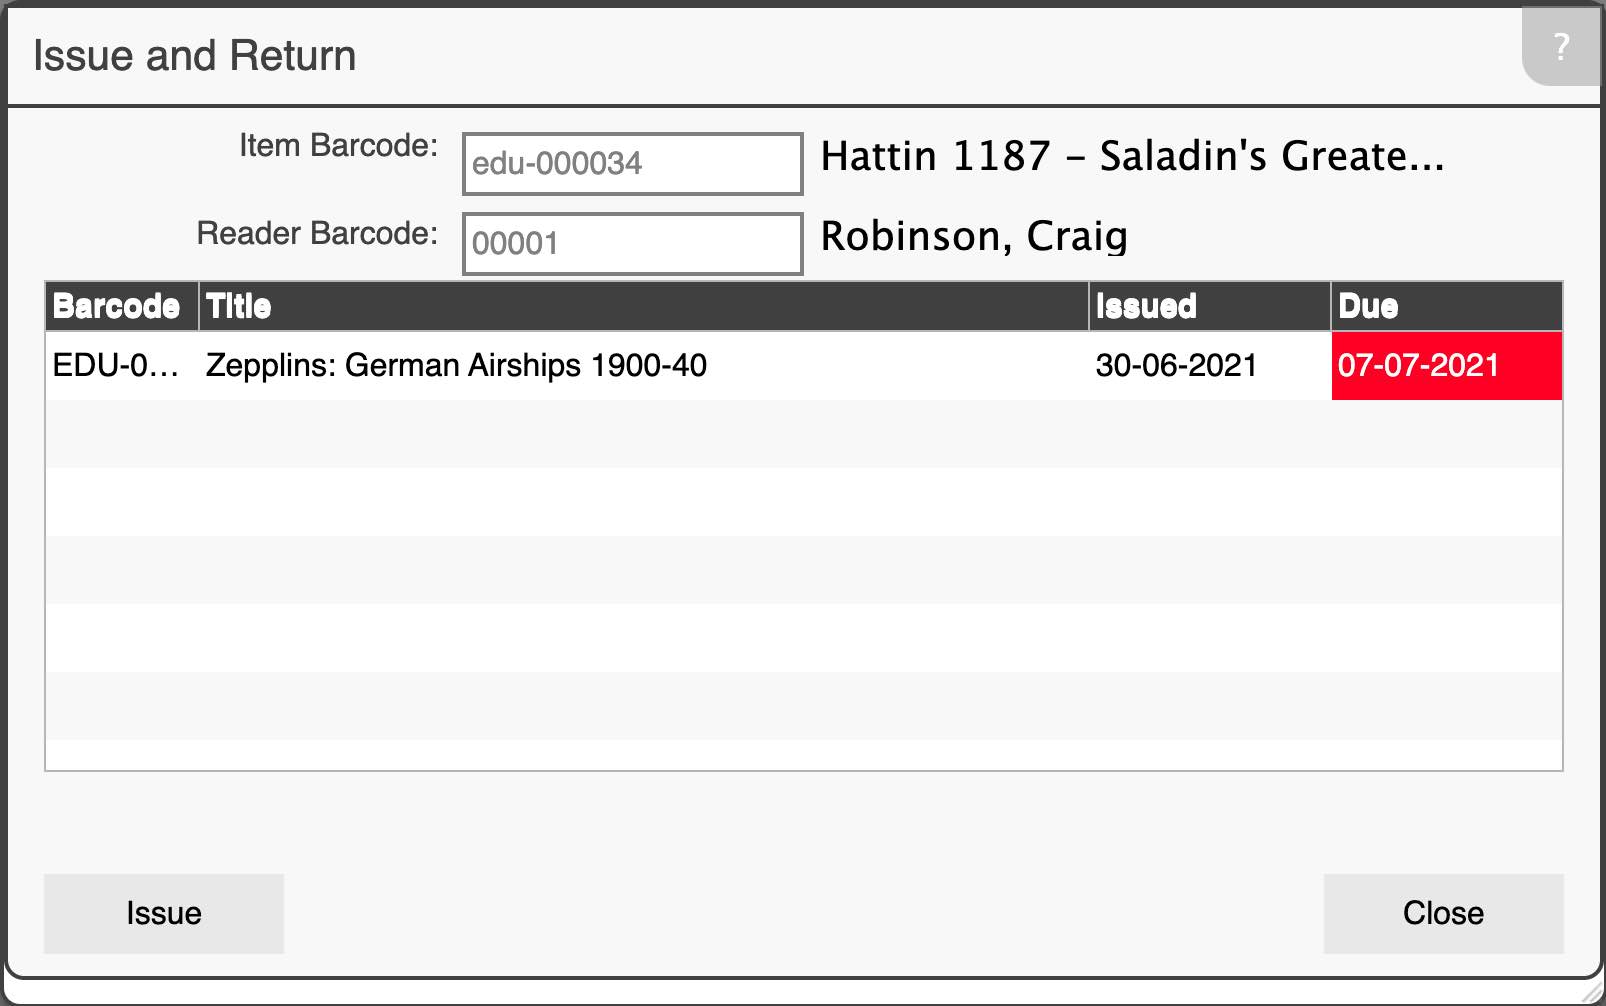
- Type or scan the barcode of the item into the [Item Barcode] field
- Type or scan the barcode of the reader into the [Reader Barcode] field
If [Auto-Issue] is turned on, the item will be immediately issued to the reader and the item barcode field will be cleared. The cursor is placed into the item barcode field ready for another item. If [Auto-Issue] is off, an [Issue] button is displayed which can be pressed when ready to perform the same action.
The reader barcode field is not cleared and must be manually emptied by typing or scanning a new reader when ready.
If the issue fails because an established rule of circulations has been broken, the [Explain] button will appear. Clicking this button will display the reason, or even multiple reasons, why the issue of the item was refused. Common reasons for failure may include:
- Media Stop - the media of the item is prevented from being circulated (e.g. reference books)
- Item Lock - the specific item has been locked from circulations (even temporarily)
- Profile Restriction - the circulation profile attached to the reader prevents circulation (even temporarily)
- Audience Restriction - the intended audience of the item clashes with an audience restriction assigned to the reader
- Item Reserved - the item is currently reserved for someone else, and issuing the item would break this reservation
- Reader Start Date - the reader has not yet officially started in the library records
- Item Start Date - the item has not yet officially started in the library records
- Reader Inactive - the reader is currently marked as 'inactive' (e.g. they have left the library)
- Item Inactive - the item is currently marked as 'inactive' (e.g. the item is being returned to a borrowing library)
- Item Limit - the reader has already reached the limit of the number of items that they are allowed to borrow at any one time
Note that the circulations engine within Mystic will always err on the side of caution - if for example, a reader does not have an audience assigned (a mis-configuration error), the circulation engine to refuse to issue.
Refusal to issue an item can be overruled by a suitable authorised staff member (see below).
Basic Returns
In order to return an item, simply type or scan the barcode of the item into the [Item Barcode] field.
If the [Auto-Return] option is turned on, the item will be immediately returned to the library. If turned off, a [Return] button us displayed which can be clicked when ready to perform the same action.
Note that as before, the [Reader Barcode] field is not cleared automatically.
Returning a Listed Item
While a valid reader is displayed as a result of entering a reader barcode into the [Reader Barcode] field, all of the items currently in the possession of that reader are displayed in the displayed list.
In order to return one of these items without needing to type or scan the barcode of the item, simply click on the item to select it and press the [Return] button which is displayed at the bottom of the dialog.
Overriding or Fixing an Issue Refusal
Occasionally, it may be correct to override a built-in refusal to issue an item. A staff user may for example, decide to allow a reader to borrow an extra item than the limit set in their profile.
To override an issue refusal first try to perform the issue as normal. Once refused, click the [Explain] button to display a message explaining why the refusal was made.
Overriding a simple configuration refusal
If the refusal was made because an established rule is being broken, click the [Override] button to perform the issue anyway. This must be done by a suitably authorised staff user, who will be challenged to enter their password for confirmation.
Correcting a mis-configuration

A refusal made because the item or reader is mis-configured can not be override as it is possible that vital information regarding the circulation is missing - for example, a missing Circulations Profile can not be overruled as it is the Circulations Profile which contains information regarding how many items can be borrowed and for how long.
In order to fix the mis-configuration automatically it is possible for a suitably authorised staff user to start the [Check Integrity] process from here (usually, this process is performed from the Reader or Item Manager). Note that automatic fixes will only assign defaults to missing values (e.g. the default Circulations Profile) - no manual selection is possible.
Once the [Explain] message is displayed, click the [Fix] button to start the Check Integrity dialog and automatically look for a limited range of problems with the item and reader records. If Mystic identified any, an option is provided to select which fixes should be applied. Red crosses indicate that a fault has been found, but will not be fixed when the [Fix] button is pressed - to run a fix on that fault, click the cross on a line to to change the cross to a green tick box ✅
Click [Fix] to perform the default fixes.
Turning on Auto-Issue or Auto-Return
If you are happy to automatically issue or return an item when the correct combination of item and reader barcodes have been entered, [Auto-Issue] and [Auto-Return] can be enabled.
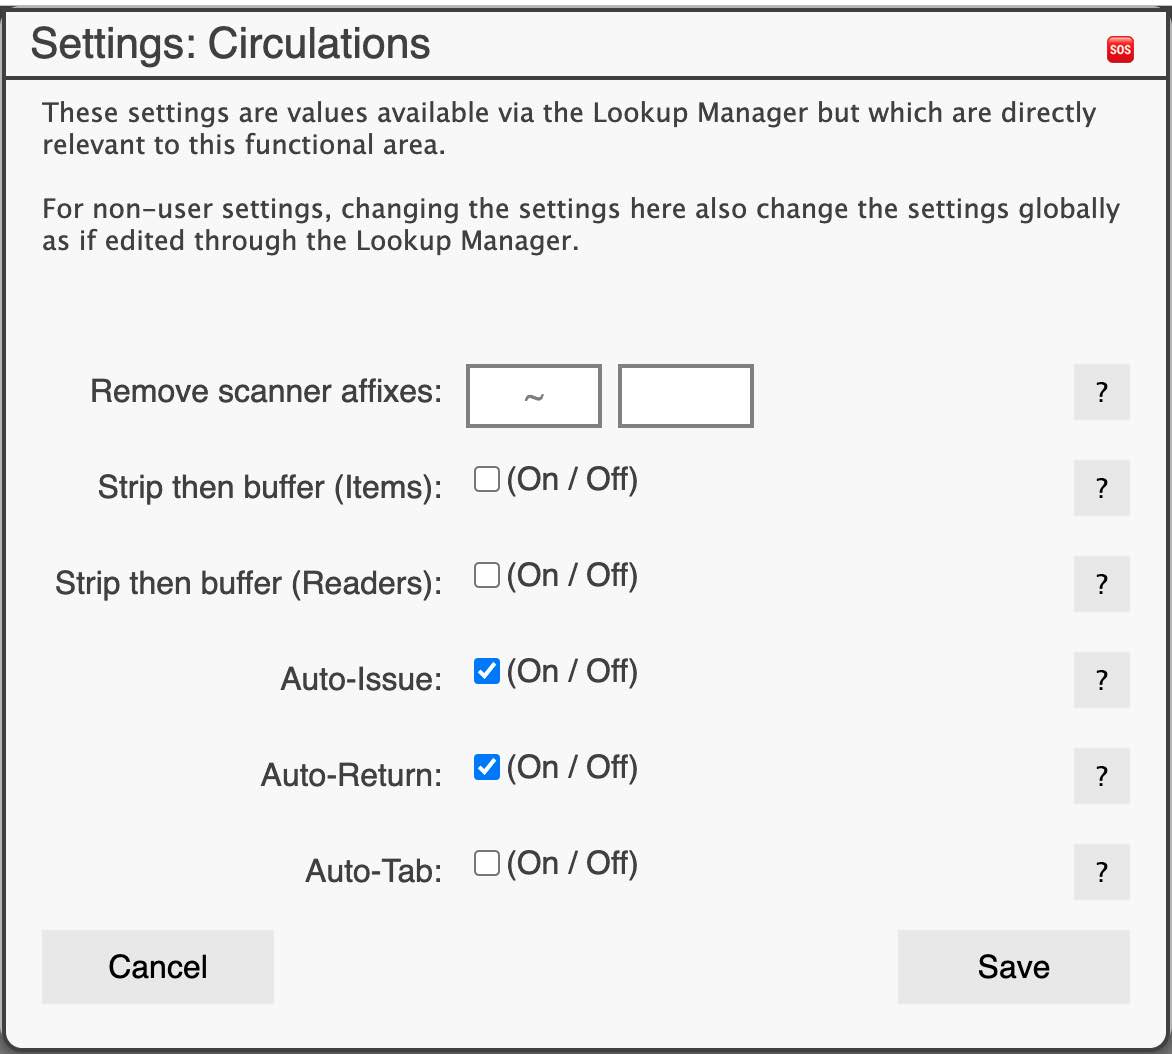
To do so, click the [?] menu button in the top right hand corner of the Issue and Return dialog - the option will only be present for suitably authorised users. In this menu, select [Options] to display the local options for the Circulations dialogs.
This options dialog is described more fully in the Local Options help article.
Click the [Auto-Issue], [Auto-Return] and [Auto-Tab] (automatically moves the cursor between the fields, as a barcode is entered and found) check boxes as required, then [Save] to save the changes into the database. You may have to close and then restart he Issue and Return dialog to make the changes fully take effect.
Next: OPAC - Issue and Return (class version)