
Table of Contents
Mystic Help
Managing Users
The user manager dialog is used to create, remove and manage users of the system.
When creating new users, it is important that only suitably authorised managerial users are permitted access to the User Manager in order to prevent users assigning themselves permission to areas to which they are not entitled to access.
Layout of the User Manager
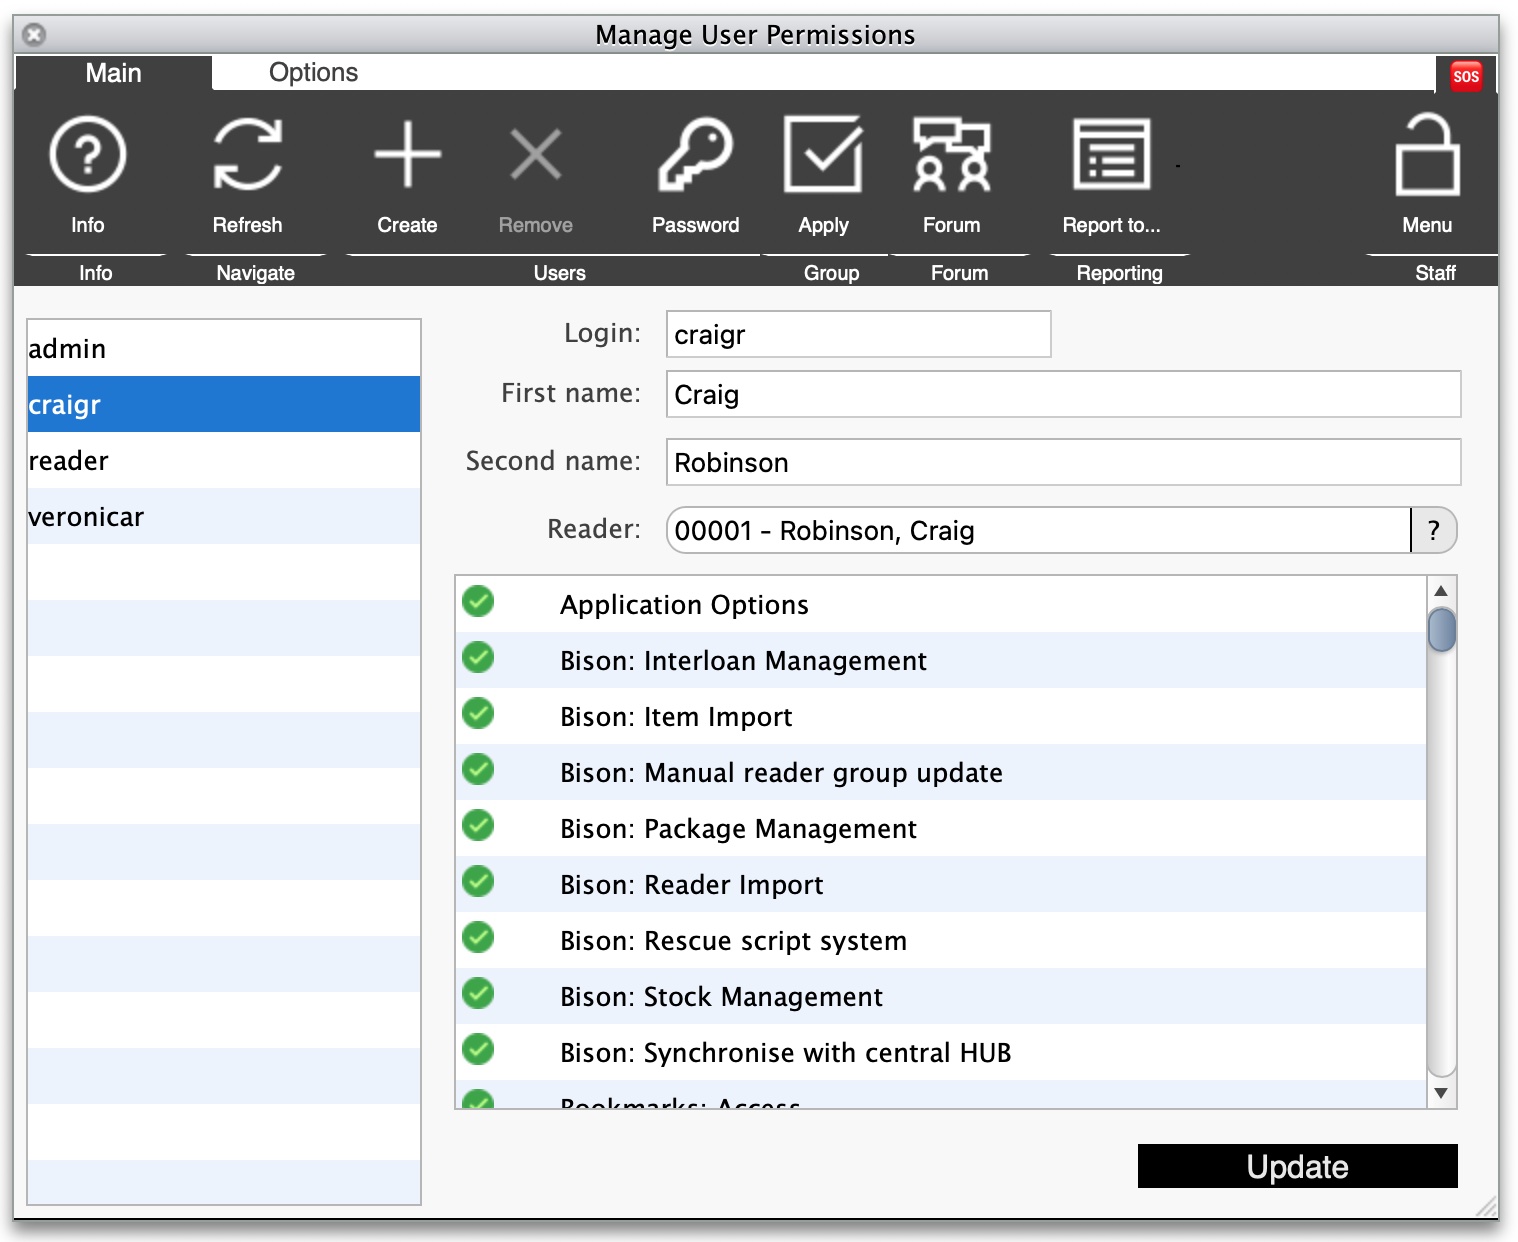
The user manager is laid out as a standard management dialog and therefore consists of four basic areas:
- Toolbar
- Left - Listing of existing users - click a user to display the user details.
- Right-Top - Basic user details
- Right-Bottom - List of user permissions, displayed as true/false check-boxes.
Creating a new user
To create a new user, enter the User Manager and then select [Create] toolbar icon from the [Users] group. On selection, a new user is created in the list with a new login name constructed of a 'U' followed by the date and time that you create it.
Note that at this point, the new user is fully created in the database and is 'active' even though it has not yet been tailored for use.
Select the new user in the list on the left hand side of the dialog in order to display the current details that are stored for the new user. At the very least, immediately change the login name of the user to that required. Change other details to match the user that this account is intended for. To save the new details, click [Update].
Note that if you are creating a new user for a new member of staff who has not yet taken up post, it is NOT necessary to disable permissions - by default, all permissions are set to False (i.e. No permission).
In order to authorise the user for different parts of the application, read down the list of permissions on the right-hand side of the dialog and 'check' (tick) each of the boxes that are required. When finished, click [Update] to save these new permissions into the database.
Modifying user permissions
Enter the User Manager and wait for the list of current users to be displayed on the left hand side of the dialog.
Select the user that you wish to change from the list to display the current details that are stored for the user. Change any of the details or permissions that are required then click [Update] to save the changes.
Note: While it is possible to change the login name of the user, this is not advised. Because of the long-term storage requirements of some parts of the application, the login name is copied into database records for audit purposes. Changing the login name of the user may result if records being apparently attributed to different users, even though they were created by the same user.
Changing a user password
If a user has forgotten their password, it is possible for a managerial user to change it to a known value - the individual should then immediately change the password to something that only they know.
To change a password, enter the user manager and select the required user from the left hand side of the screen. Once the user is selected, click the [Password] toolbar icon in the [Users] group and enter a new password in the dialog provided.
Removing a user
Warning: Do not remove users unless absolutely necessary. Once a user has been removed from the system, they can not be recovered in their original form.
In order to remove a user from the database, enter the User Manager and wait for the list of current users to be displayed on the left hand side of the dialog. Select the user to be removed and their details will be displayed on the right hand side of the dialog.
Select the [Remove] toolbar icon from the [Users] group, then select [Yes] from the confirmation dialog.
Note: Due to long term data storage requirements, some database records are created with the user login name copied into the record rather than linked. As a result, in most cases removal of the user will not prevent audit information from being recovered.
Apply permissions groups
If the user being created is known to require a particular range of user permissions, it is possible to set many permissions all in one go which are suitable for that type of user.
To do so, select the user required in the left hand list to display their details, then select the [Apply] toolbar icon from the [Group] section. This displays a menu which allows you to remove all current permissions, or select typical permissions that are useful to users of a particular type. Selecting an option will turn on that set of permissions in the user permissions list.
Note: This system is not setting a user group for the user - selection of an option directly affects the user permissions of the current user. Typically, use the [Apply] icon to set a range of permissions, then manually add or remove permissions to suite the user needs.
Forum
The [Forum] toolbar icon allows you to enable the user for access to features and functions of the Mystic system externally to the local database. Effectively, this enables access to the built in forum facility for the user.
Typically, users who are assistants only, or perhaps even trusted readers, should not be provided access to the Forum.
Report to...
The [Report To…] toolbar icon allows the user to directly access any reports which are applicable to the User Manager.
At this time, no reports are enabled for this manager.
Enabling a reader assistant
In order to create a reader assistant, create a new user account with the minimum permissions required for the assistant role.
Once created, select the [Reader] drop-down option and select the reader account which should be attached to this pseudo-managerial user account, then [Update] the user account.
When logging into Mystic, the reader will be provided additional permissions as selected in the User Manager.